Open Mon - Fri 9:00 am - 5:00 pm
Email info@konaimpact.com Call Now! (808) 329-6077

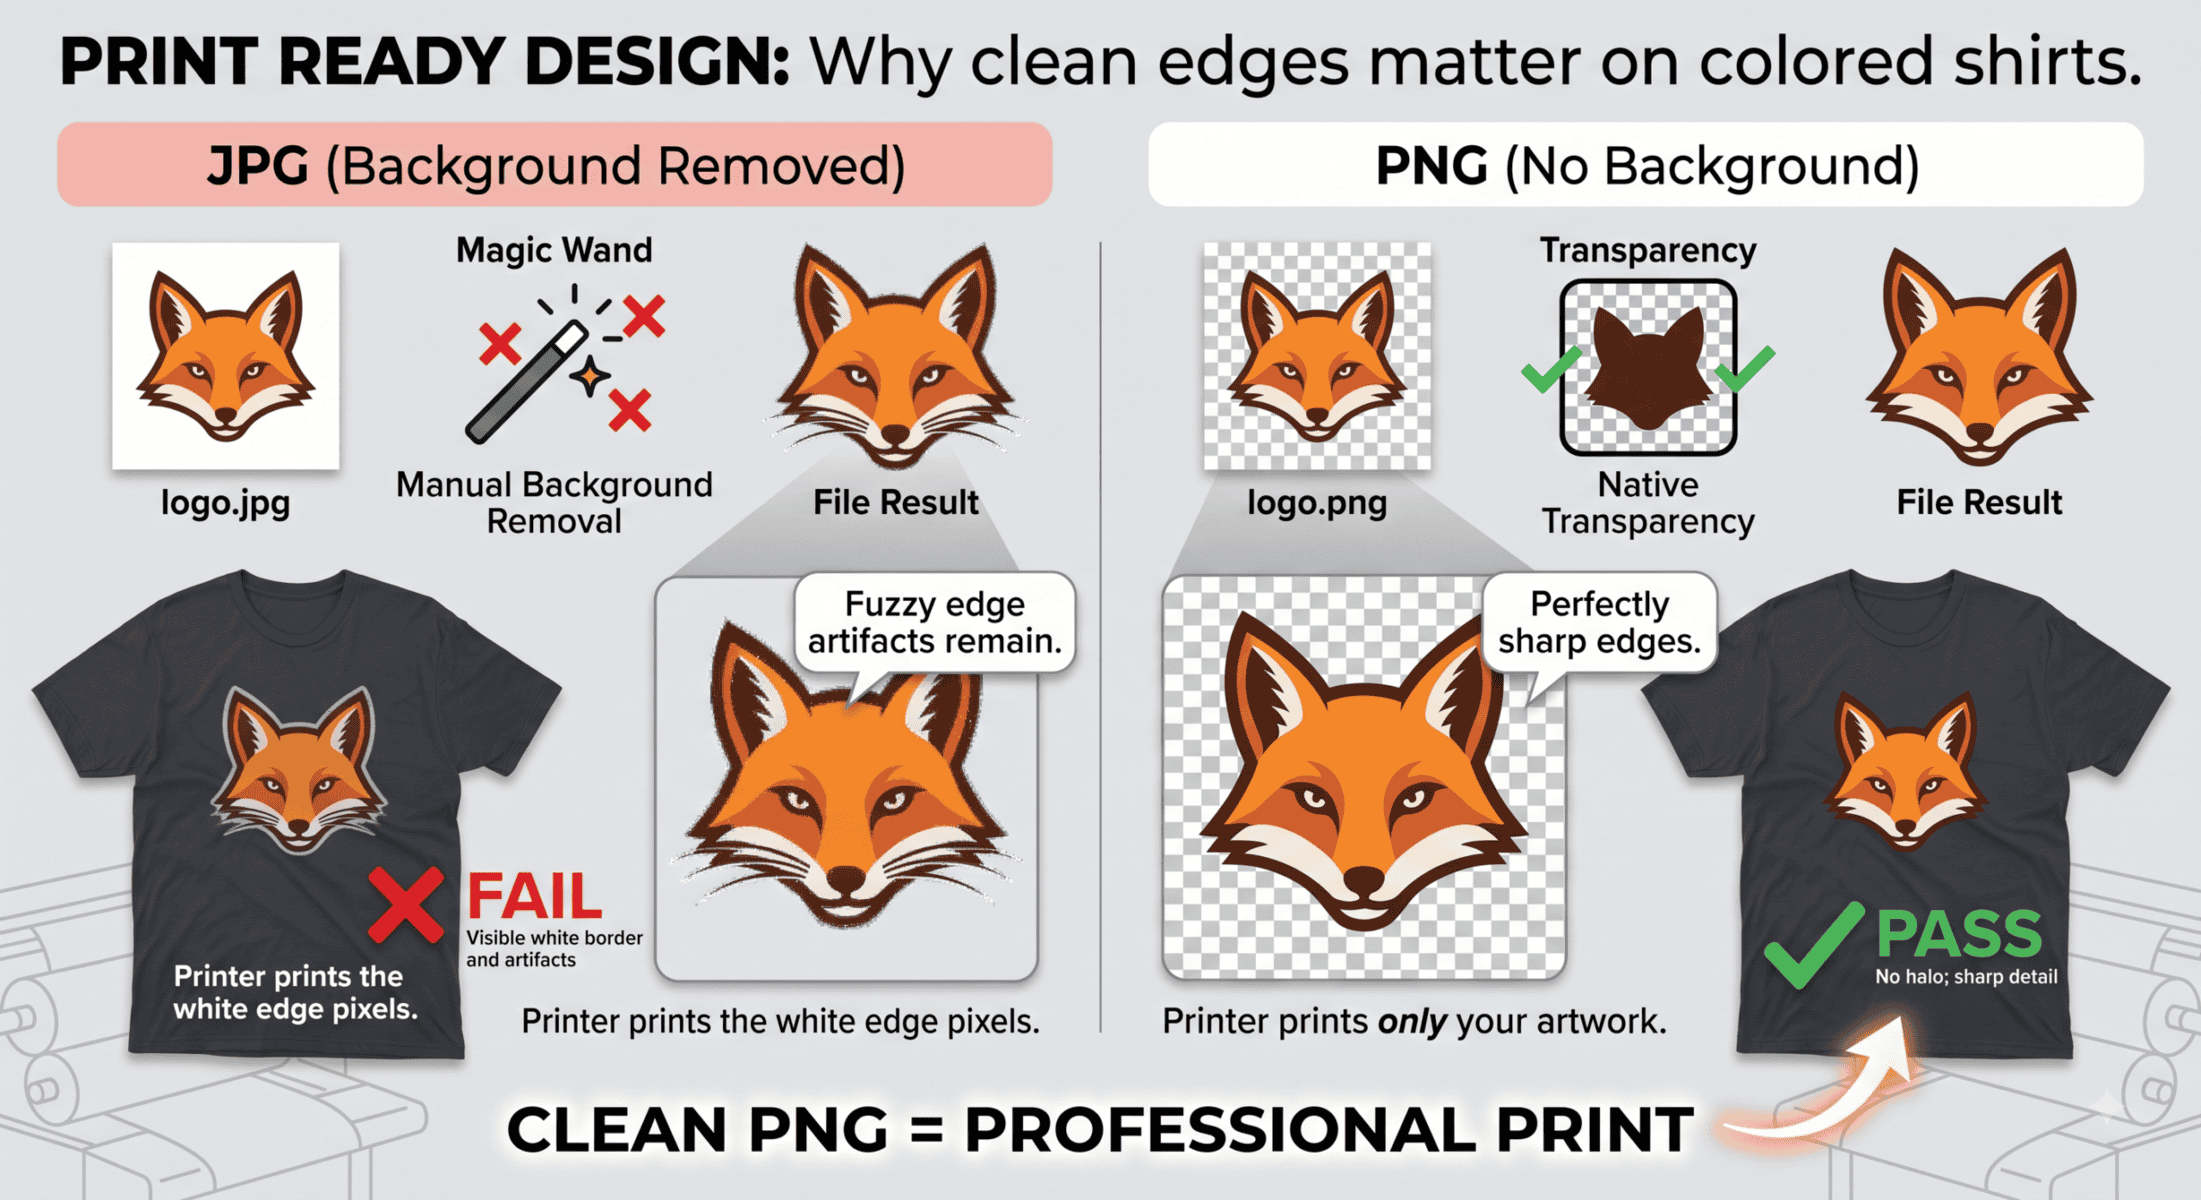
When printing a image on a colored T-shirt, the printer applies a layer of white ink underneath your image so the design remains vibrant.
If your image file has hidden issues such as blurry edges, or leftover image pixels, the printer reads those errors and prints them directly onto the shirt as though they were part of your design.
Here is why a native PNG with a transparent background beats a JPG with the white background erased. The same is true for a PNG with a white or other color background with background improperly erased.
The Problem with a “Cleaned” JPG
JPGs Don’t Support Transparency:
A JPG file automatically saves every background pixel as solid white.
The Erasing Trap:
Erasing or magic-wand deleting a white background from a JPG leaves behind a thin fringe of light-colored pixels around the edge (anti-aliasing).
The Printer’s Confusion:
The printer cannot tell those leftover pixels are mistakes—it assumes they are part of your art and prints a white or grayish outline around your design.
The Solution: A Native PNG
Built for Transparency:
PNG files are designed from the start to hold smooth, invisible backgrounds.
Crisp Edges:
Every pixel on the edge of the artwork is crisp and defined—no semi-translucent white fuzz.
Light Color on Dark Shirts:
The printer places white ink ONLY under your actual design, making colors pop on dark or colored shirts.
Bottom Line:
Start with a true vector/line art logo, or original no background PNG artwork for best results.
Here are some tools if you absolutely cannot provide a clean edge image/logo:
Try online tools like SnapEdit. There are many similar tools online to remove and re-scale your artwork. If you have your own AI login, try them also.
This is the easiest workflow for most pixel based images:
This order matters. If you keep the transparent PNG as the master, making the white-background version is easy. The reverse is not.
SnapEdit’s background remover is also useful for small image batches because it is free to use, does not require credits, and supports up to 5 images at once.
Common mistakes to avoid:
Do not save only a flattened white-background JPG. Keep the transparent PNG as the reusable master.
Do not assume every PNG is transparent. Some PNG files still have a white or black background baked in.
Do not upscale a very weak source repeatedly. Start with the best/largest uploadable image you have.